|

New Barn (2017)
5-3-17
The goats are
moved in!
There are a
lot of photos on this page so it may take a while to load
depending on your browser or device. Click any picture to
see the full size image. Newest on top.
To see what it has cost
us to build this barn, click here.
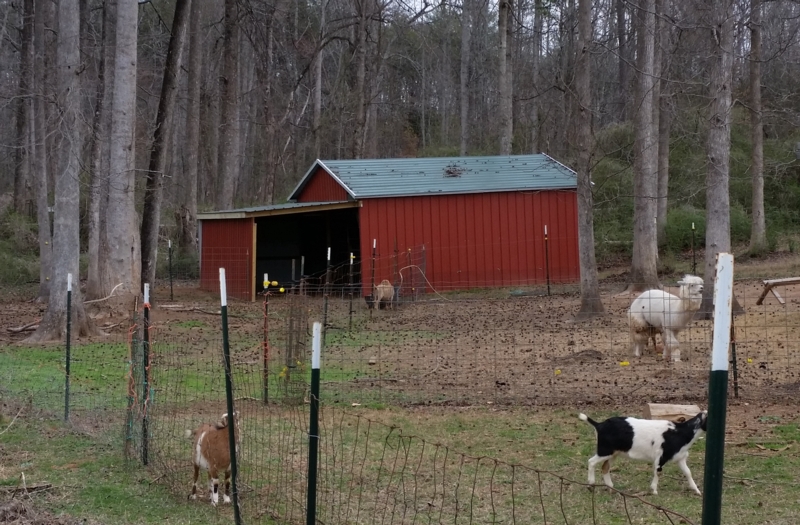
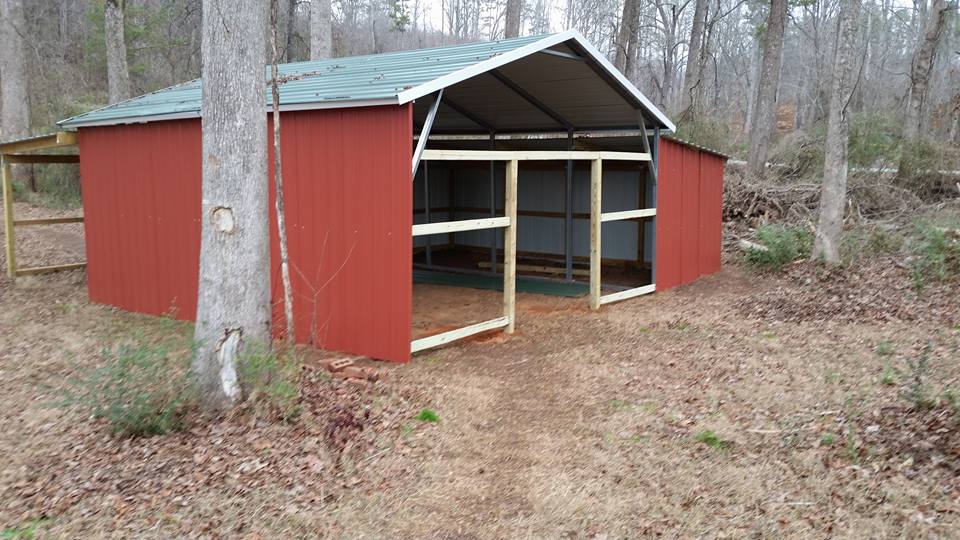
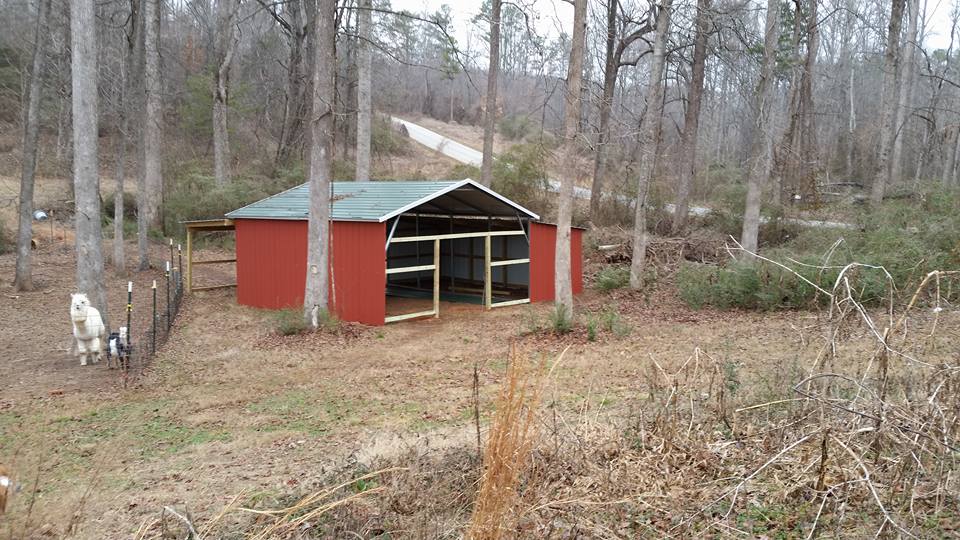
May 3rd, 2017
The goats have settled in nicely to the new barn. We've done
a little shuffling around of where we're milking but so far
so good! Here are some new photos.


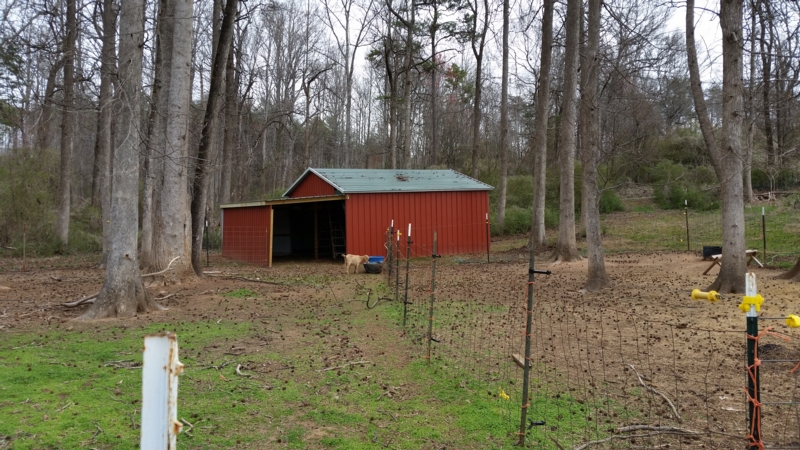
March 20th, 2017
We moved the does into
the new barn on March 18th, so they're still getting use tot
things but it's finally goat occupied!

The doe's are in the back
lean-to.
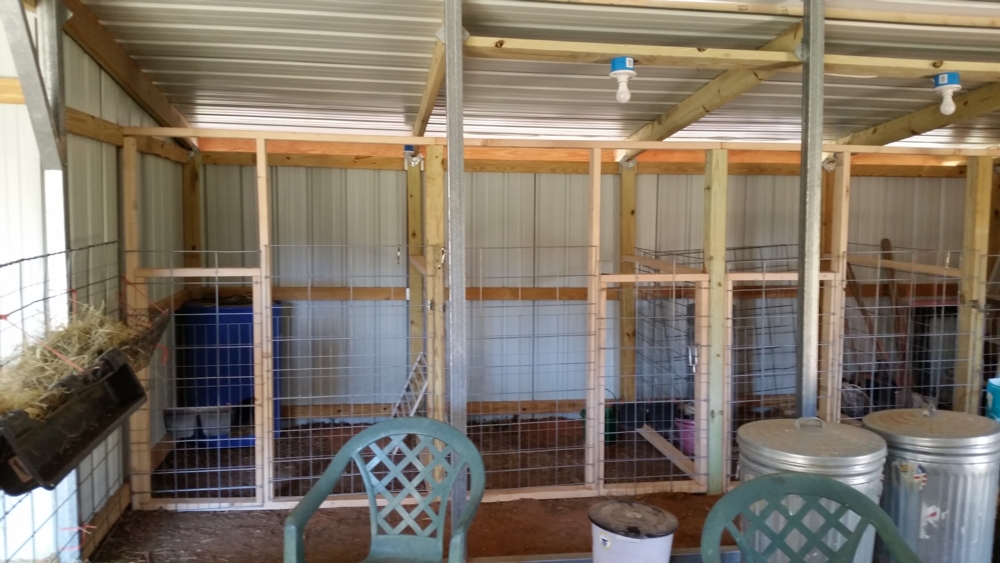
The stalls (1 and 2 in this
photo) are in the side lean-to. We put 4 stalls altogether
in this lean-to and left room for an isle way once we put up
a dividing wall. The trash cans are our feed bins.
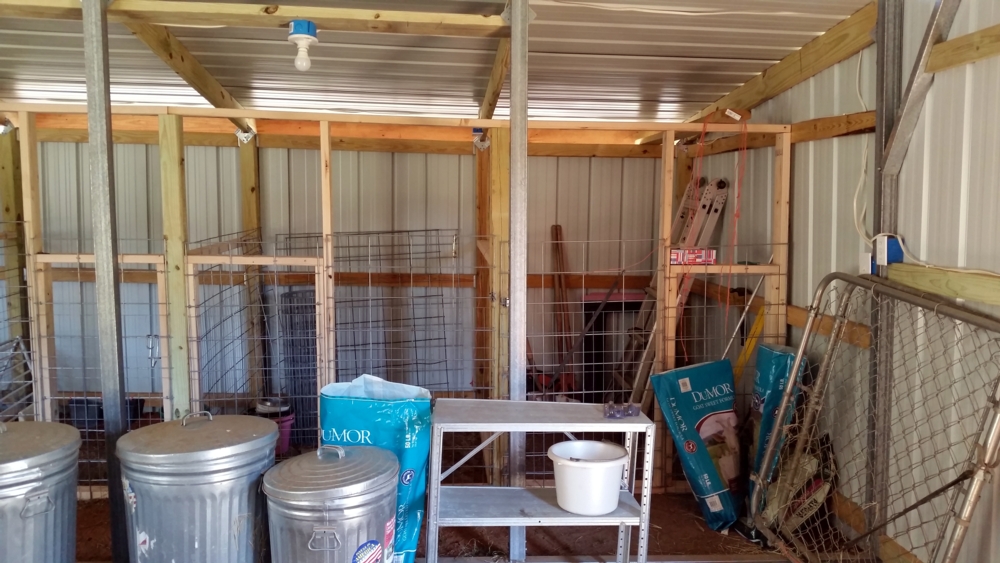
Stalls 3 & 4 are closer to the front of the barn and right
now are the 'catch all' zones since we're still changing
things around and putting things together.
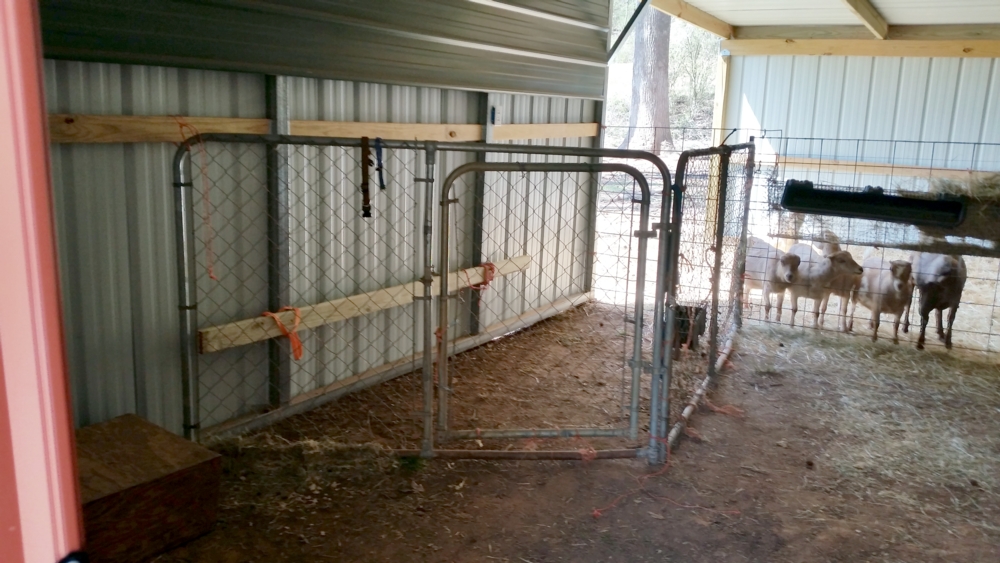
This is my holding stall. The place I bring my milkers into
and tie up while I milk. As of 3-20-17 I am milking 4 does
(Elise, Oracle, Zin & Ruby) so 3 are in the holding pen
while I milk the 4th.
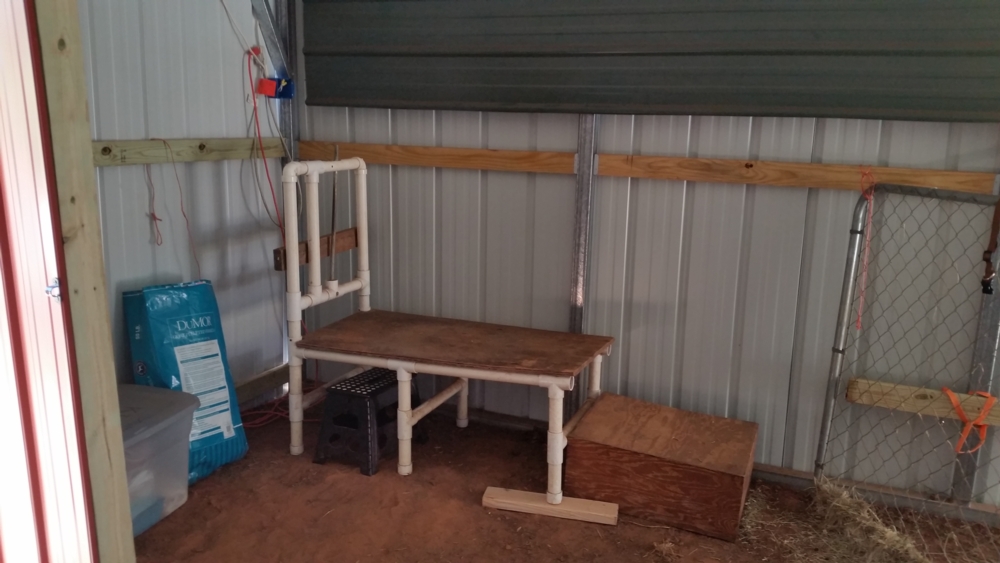
The milk stand.
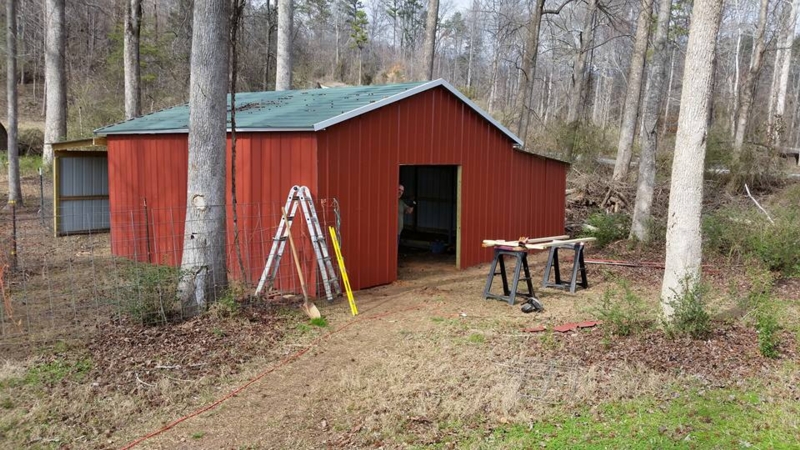
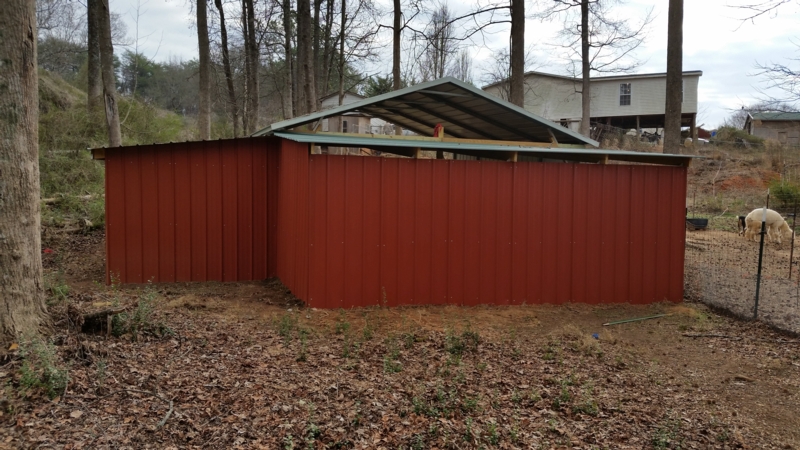
February 27th, 2017
Doors are up, back wall
is almost finished and we are just about ready to move the
goats!

We will be trimming out the
door in white which will look great. We also plan to put a
piece of white trim along the lean to to match the other
part of the barn.
The last little piece wasn't
finished on Sunday because of daylight. We simply ran out so
we will be finishing it very soon.
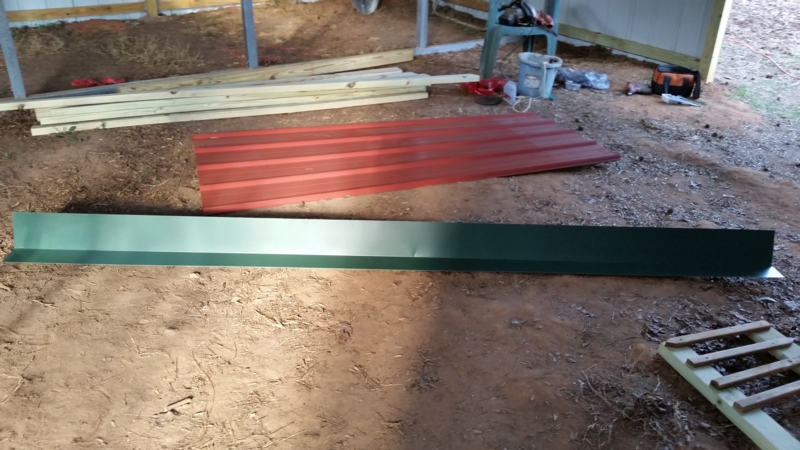
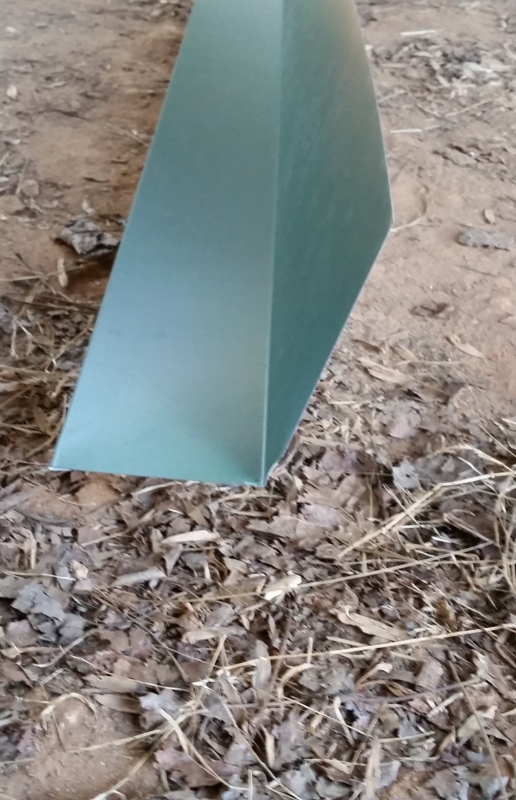
For the section above the back lean-to we bought 2 pieces of
this flashing in green.
This is the doe's side and
entrance.
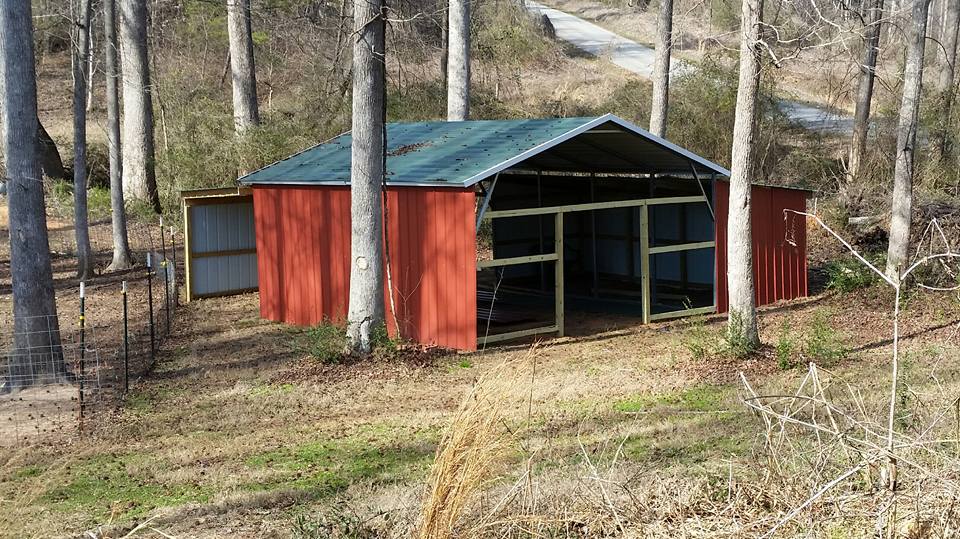
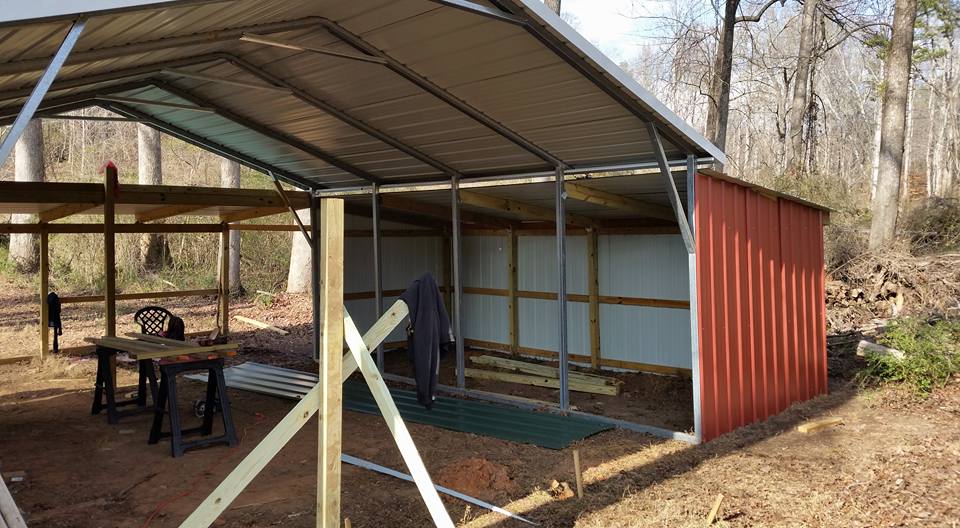
February 11th, 2017
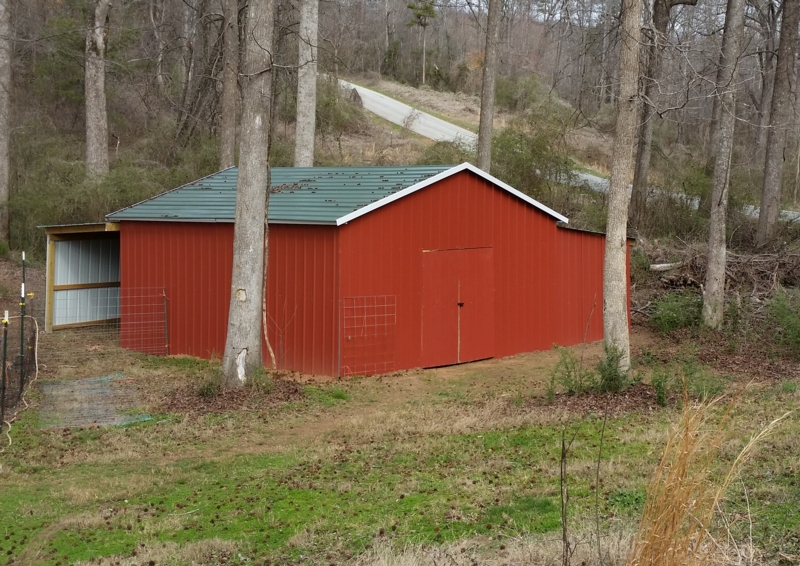
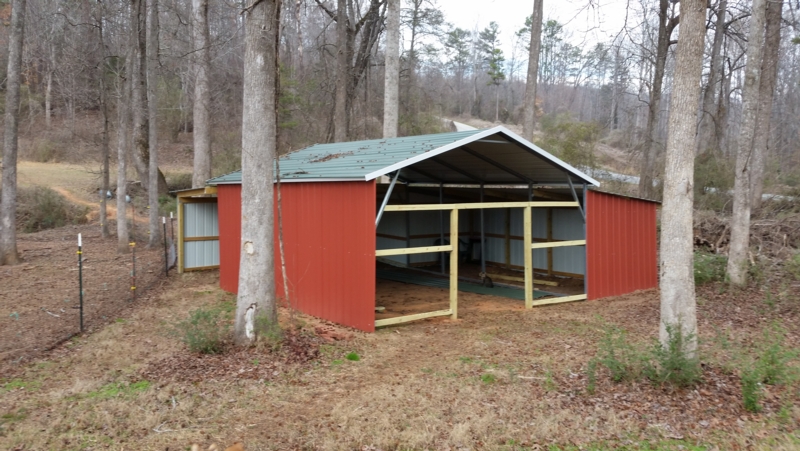
Front is up! The
barn is almost done.

Front views of the barn with the front up. Still have to
make some doors and finish the back above the lean-to roof
and the doorway for the goats to come in but we are nearly
done!
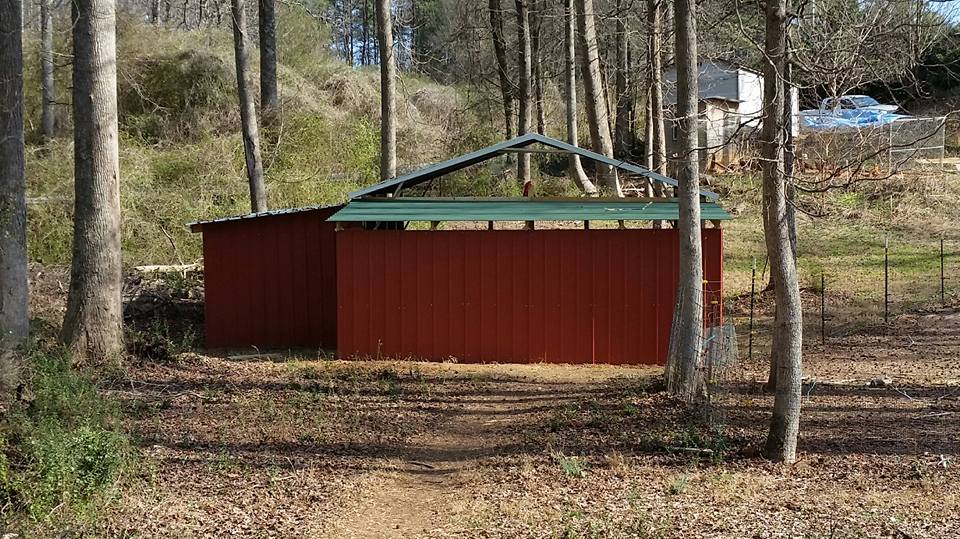
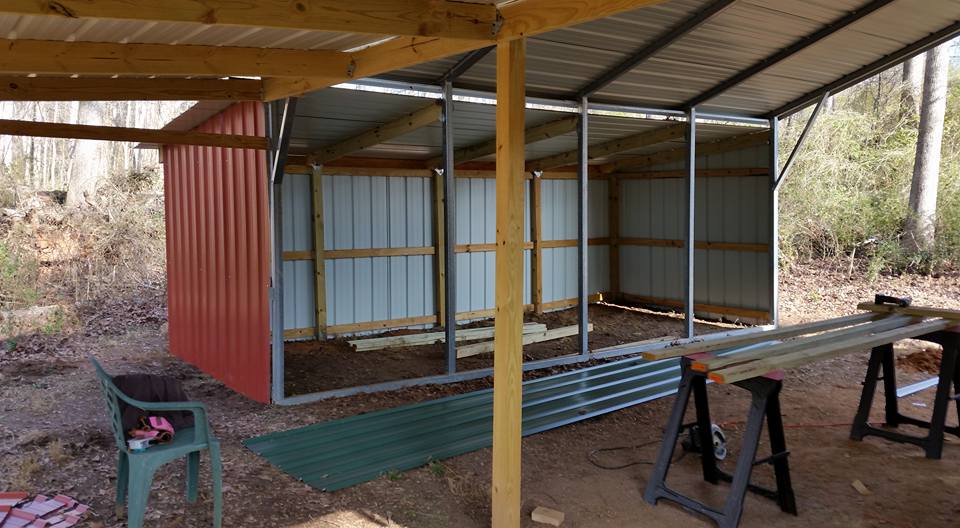
February 2nd, 2017
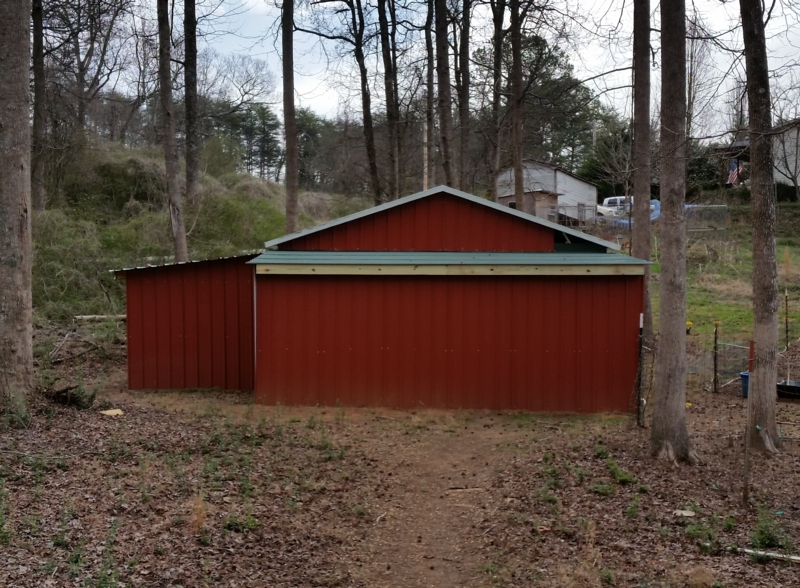
Back corner wall is
up and we're just about ready to move goats in. Hoping to
get the wall above the roof up soon.

Front views of the barn. The does will go in at the back
entrance on the left side.
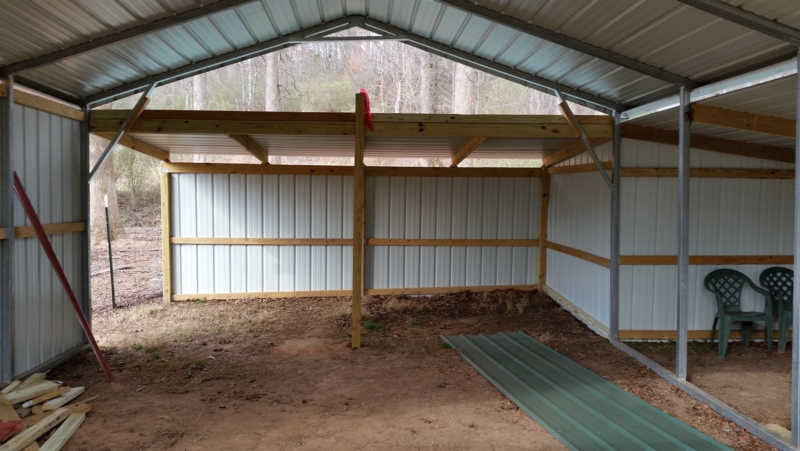
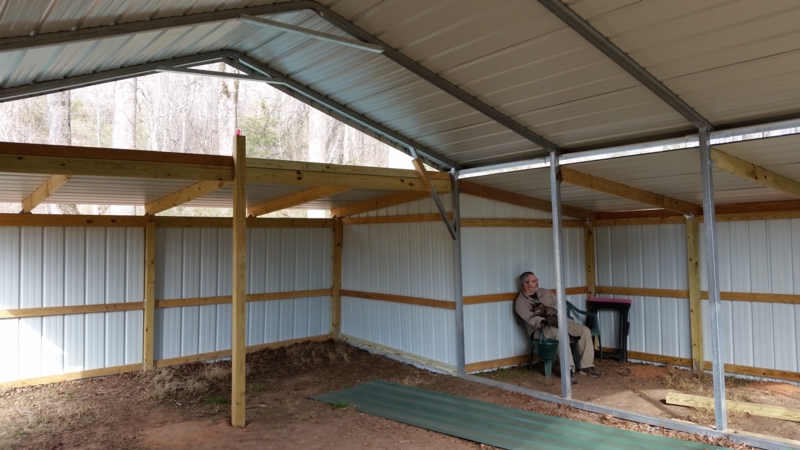
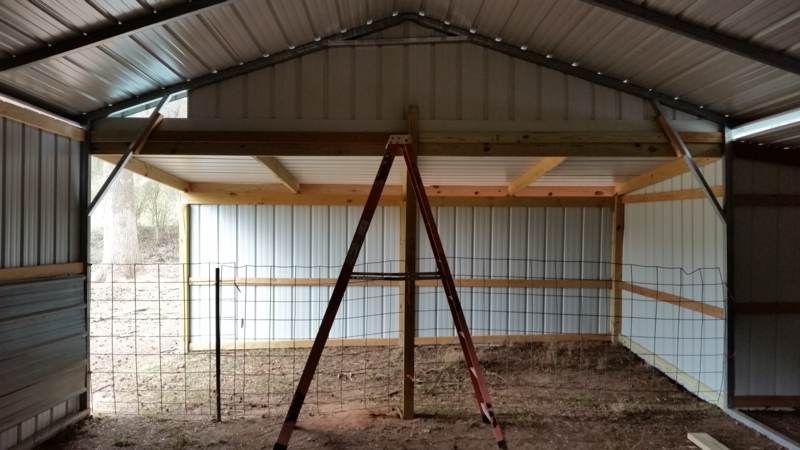
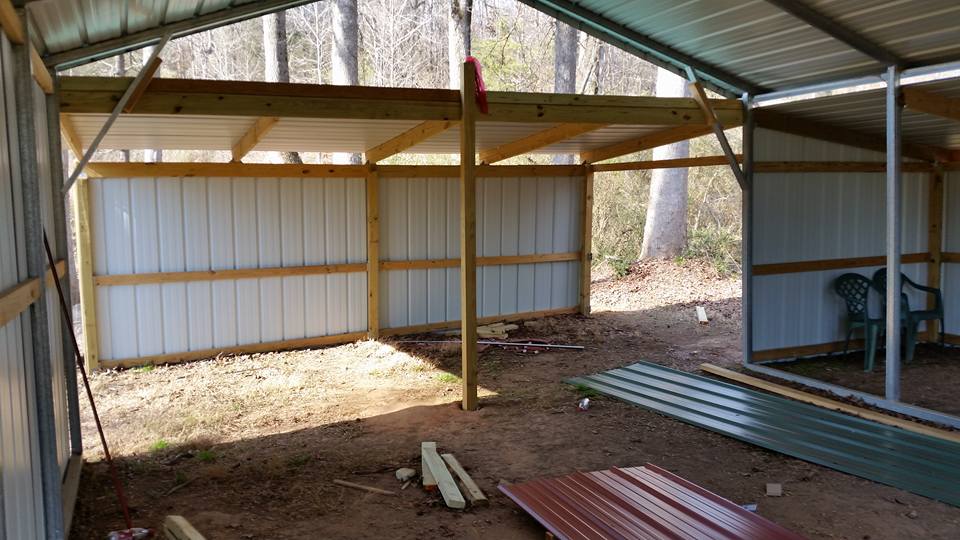
Inside view of the future doe's area. We have to put the
2x6s up yet to match the other lean-to.
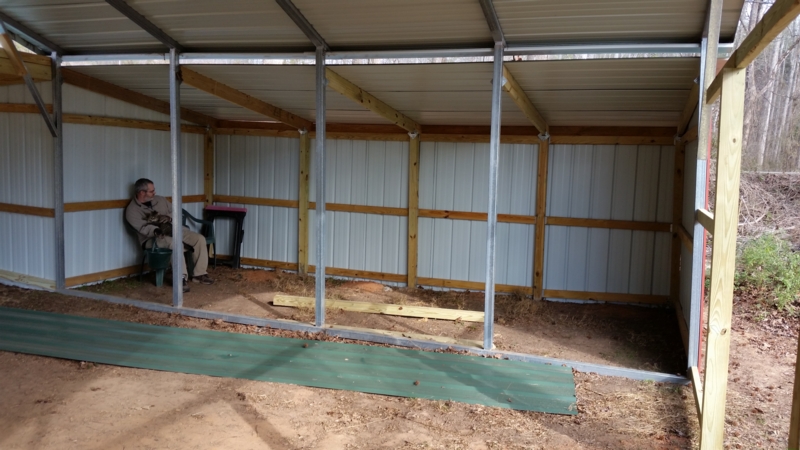
Inside view of the roadside lean-to where the stalls
will be and a rear view of the barn.
January 31st, 2017
Back wall is up,
the corner will be done tomorrow. We still have to do the
wall section directly above the roof on the back yet. That
may be all that we do before moving the herd.
Front (left) and inside
(right) views of the barn. You can see the wall section
above the roof in the right photo. This section of pieces
will be all 4 foot or less. The edge pieces are hardly more
than a foot, foot and a half tall.

This is the back side looking
back towards the house. This wall was easy because there was
no cutting to do. The corner section will be a little harder
due to each piece having to be cut, but we've done 2 other
walls like it so we've gotten pretty decent at it.
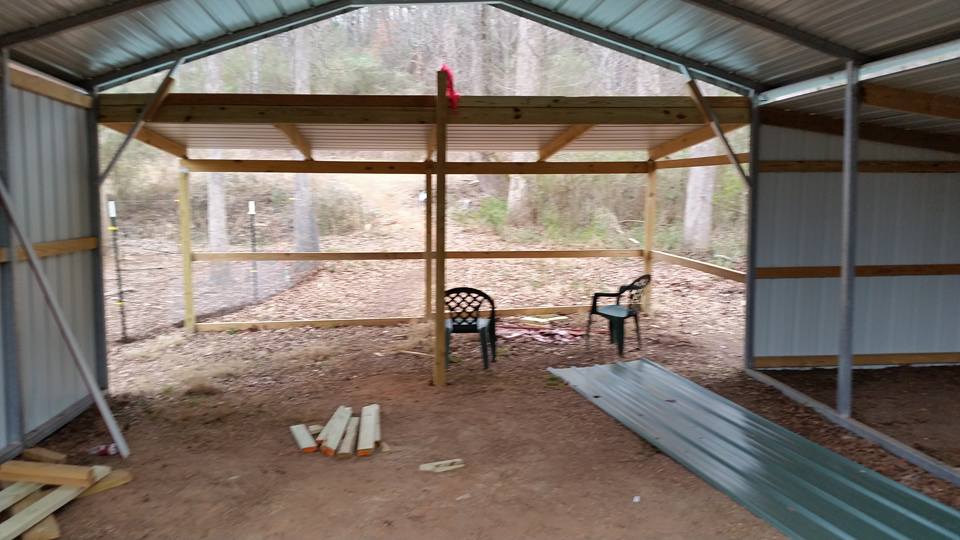
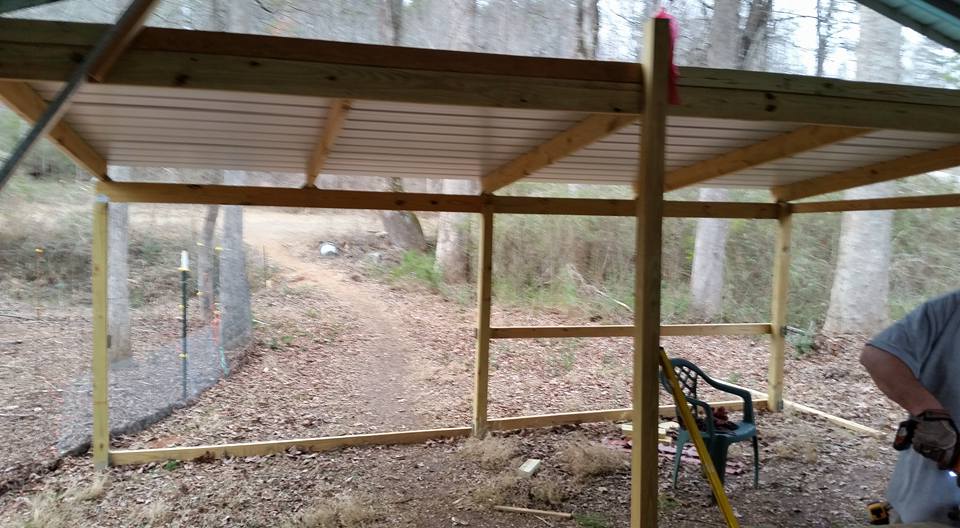
January 16th, 2017
Front wall framing
is going up. We may put a couple 2x4s above the door area
before the metal goes on, we'll decide that when we order
the metal.
The framing is in place to
enclose the front now. We plan to buy the metal to enclose
the back first. From this angle you can see the back lean-to
and the side facing the bucks will be the gate for the goats
to access their area. I will be redoing some fencing soon as
well.

Left: Front from inside the
barn.
Right: The back from inside the barn. This is where the does
will live. To the right will be where kidding stalls will
be. This center area will be where we milk, where feed is
kept and possibly a milk room in time. We'll see.
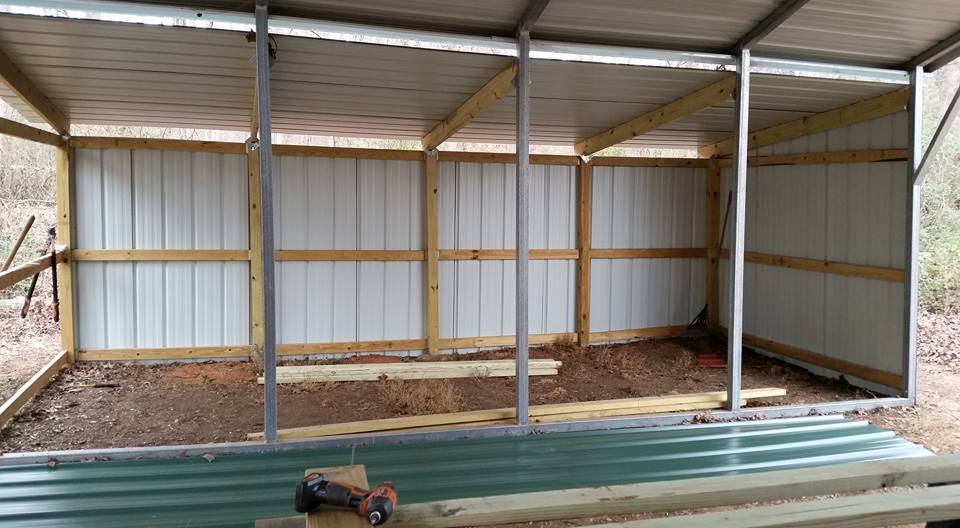
January 15th, 2017
The last wall on
the roadside lean-to is up.
Last wall on the roadside
lean-to is up. This is the section we plan to use for
kidding stalls. The back lean-to will be where the does
live.
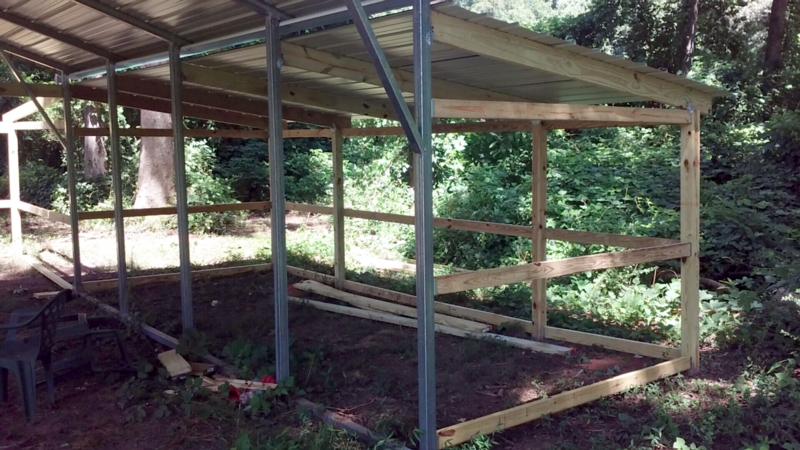
January 14th, 2017
The roof is
up on the back lean-to! The walls have started going up too.
We have the front of the roadside lean-to and the side
facing the road covered.
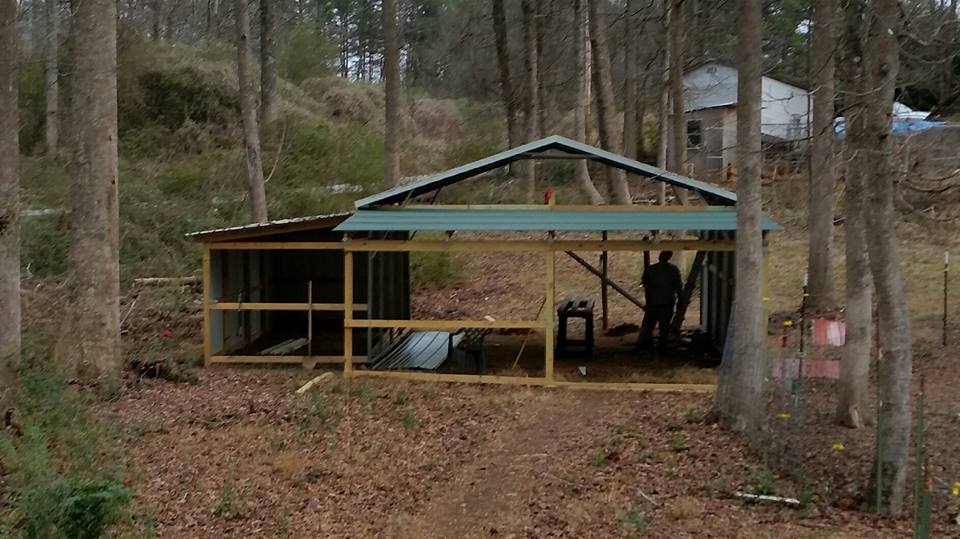
Left: Standing at the bridge
to the other half of our property looking back towards the
house. This is the back side of the new barn. This section
will be the doe's area. Right: This is the roof on the doe's
area already up. Now to enclose it!

Here are the walls on the
roadside lean-to going up. We have to pick-up more metal
cutting saw blades in order to put up the rear wall on this
lean-to.
Exterior view of the siding.
The left photo is from the road looking at the barn. The
right photo is the front. The left side of siding is facing
the current buck pasture.
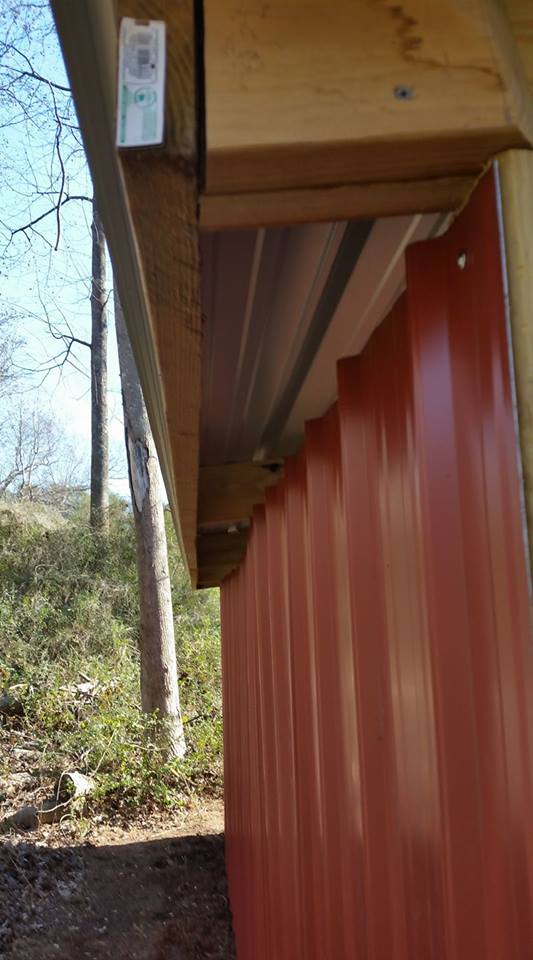
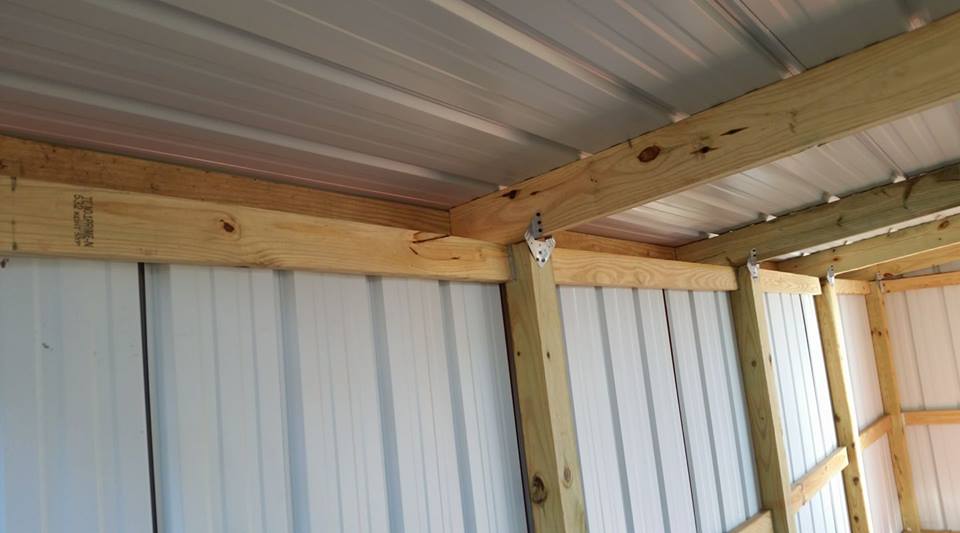
These photos show how we are
handling ventilation in the lean-to's. The 2x6 rafters
overhang the walls, so we capped it with another 2x6 and
stopped the metal siding with the interior 2x4 that runs
from 4x4 to 4x4. This will allow good ventilation without it
being drafty and will also help with any air flow issues
causing condensation on the roof.
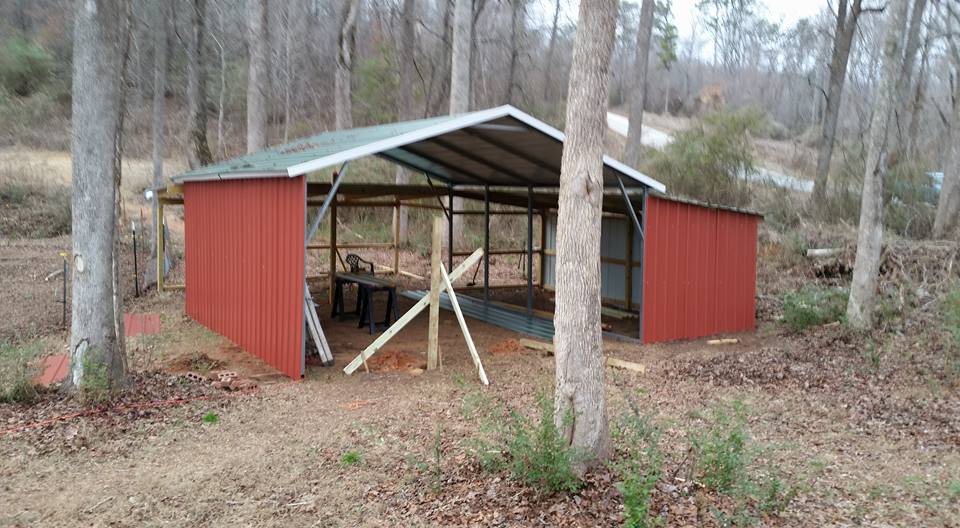
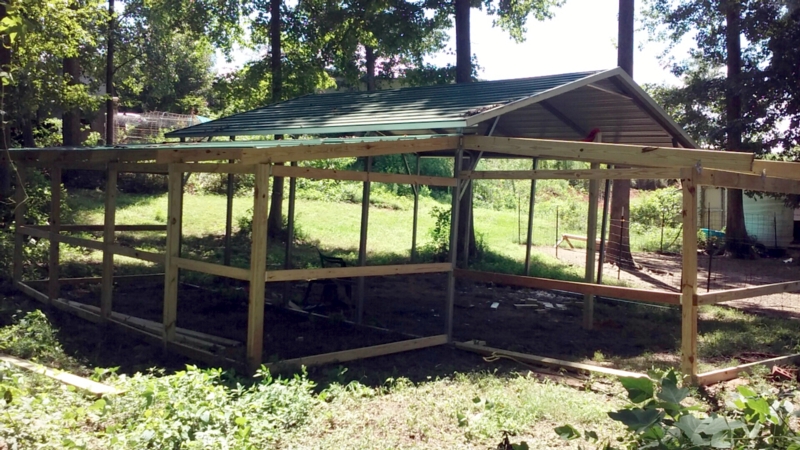
August 14th, 2016
We are
nearly finished with the framing on all sides but the front.
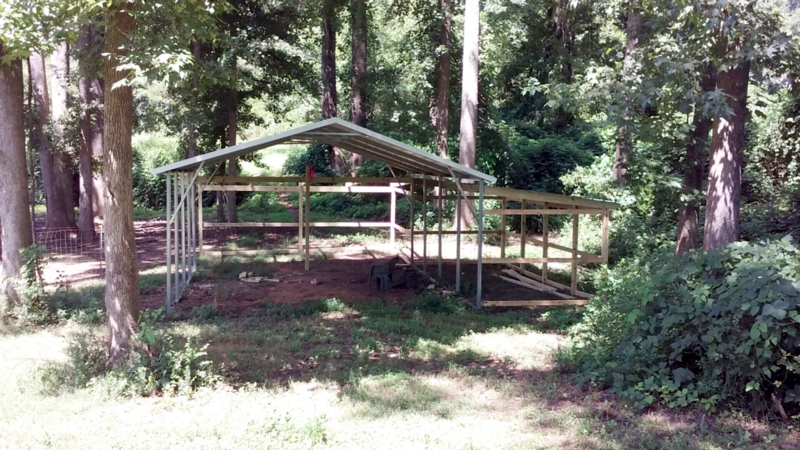
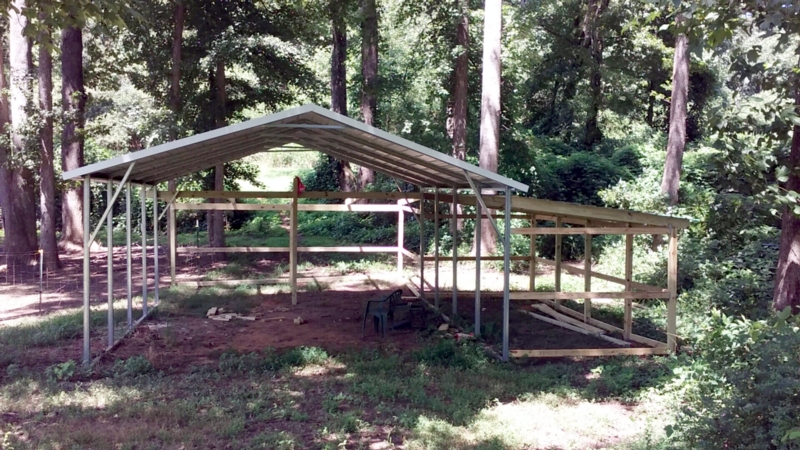
The photos above are all front
views of the current enclosing progress.
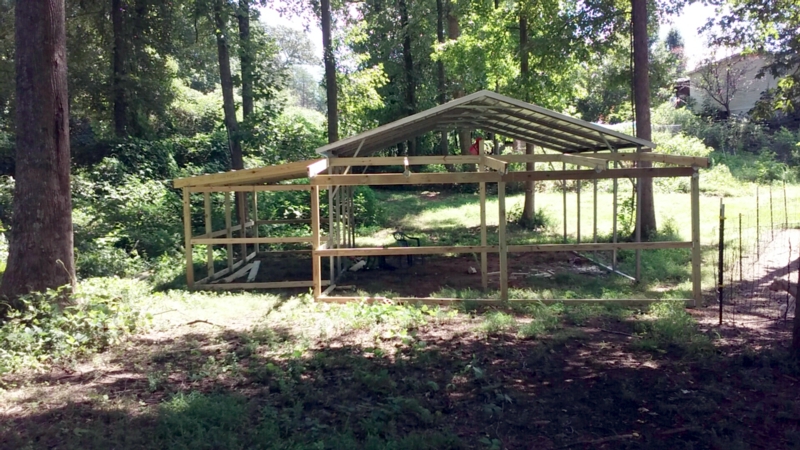
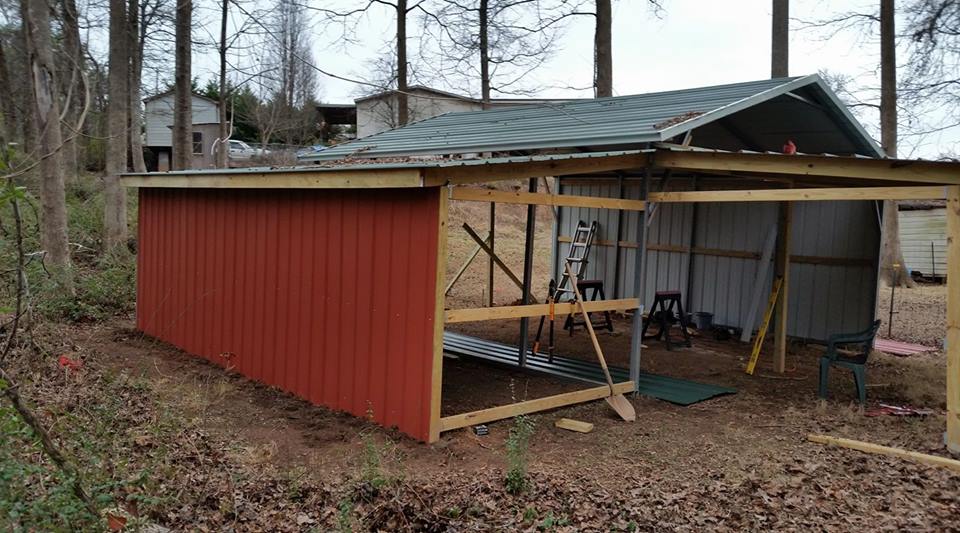
Rear views of the current
progress. First is near the bridge looking at the barn.
Second is right next to the lean-tos viewing in.

These two views are from the
buck pen side viewing the barn. This would looking towards
the road with our house on the right and bridge and creek on
the left.
This is a back/road side view.
It's heavy brush on this side so I'm standing in the
furtherst back part that I can get to. It shows the far back
corner of the barn. We had planned to enclose this corner
originally but have since chosen to leave it out.
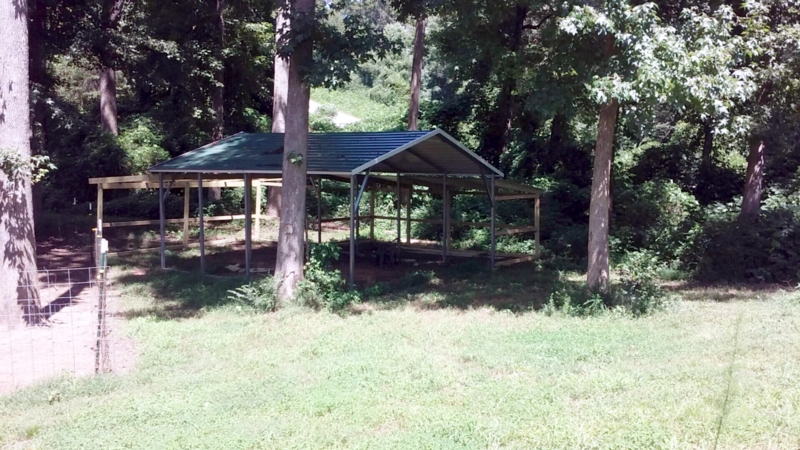
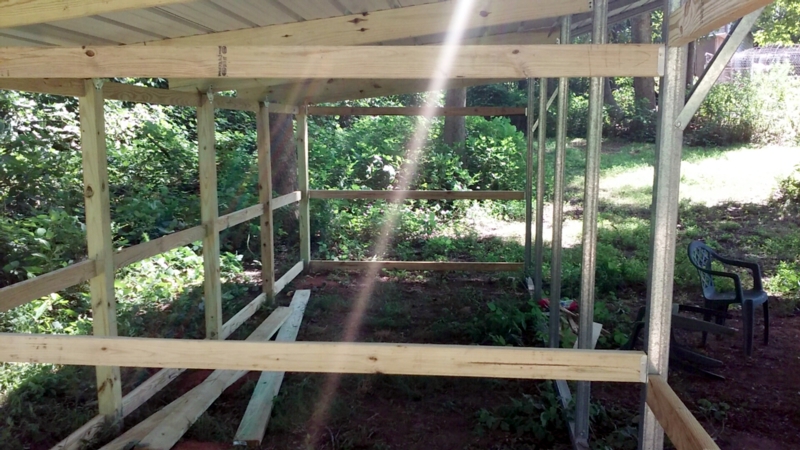
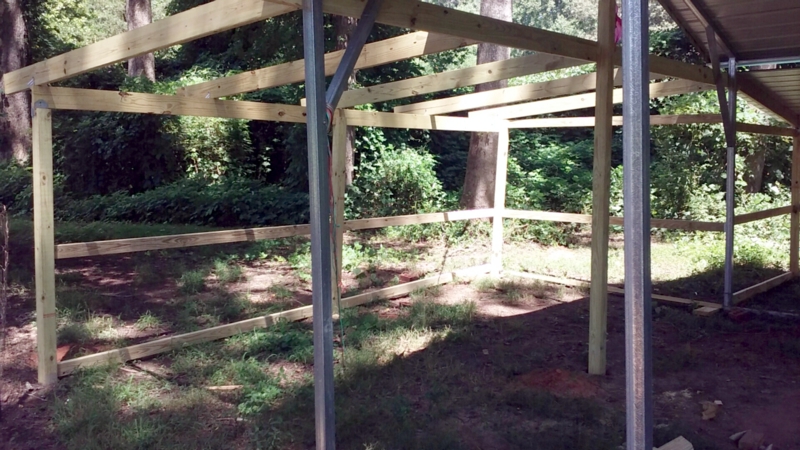
July 6th, 2016
The roof is
up on the side lean-to. The back is coming soon!
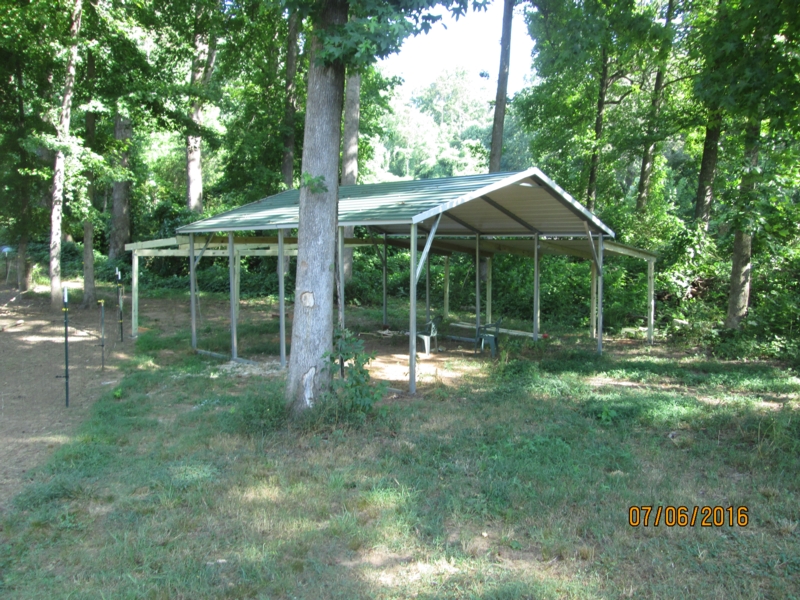 
Front view of the left lean-to's roof on.
 
Inside view of the side
lean-to's roof up.
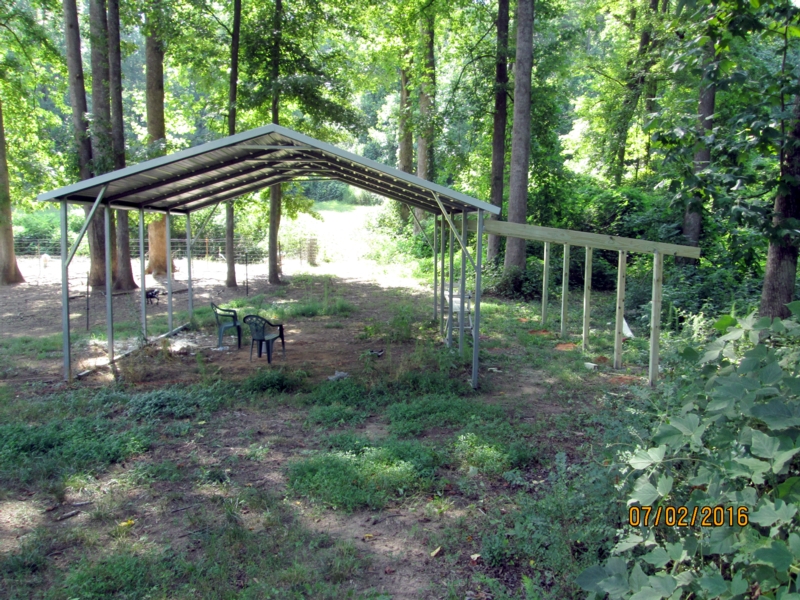
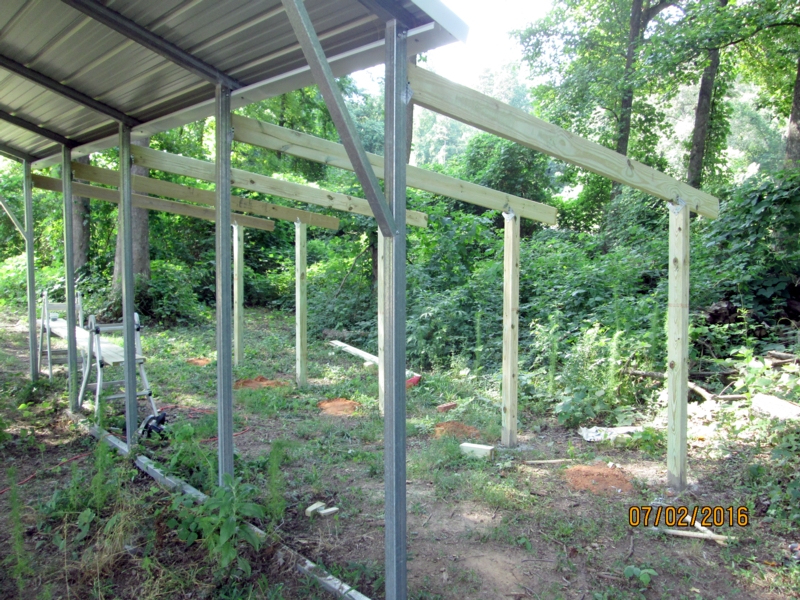
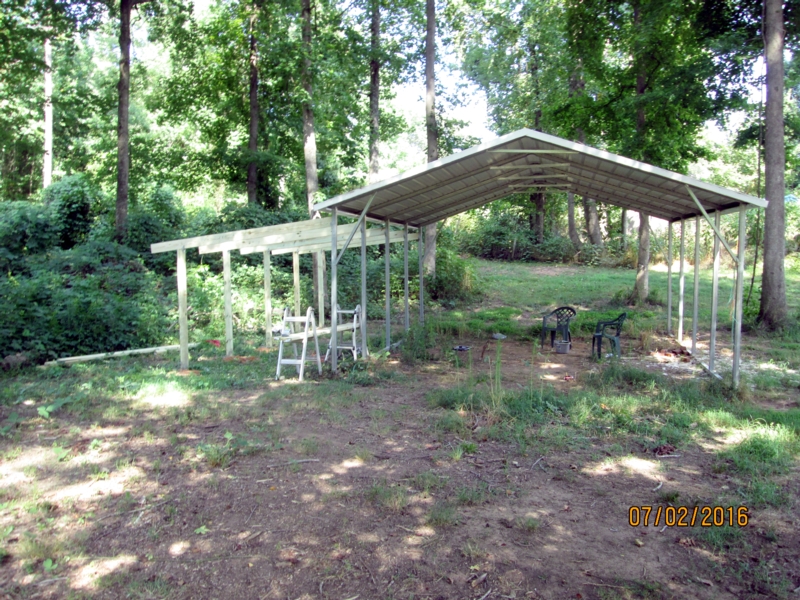
July 4th, 2016
The back
lean-to is on!

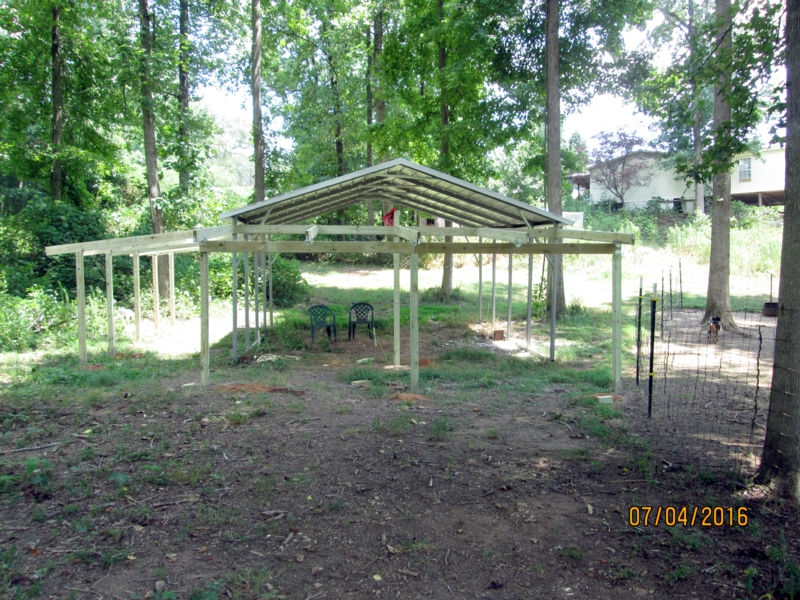
Front and rear of with the
rafters up.
Front view.
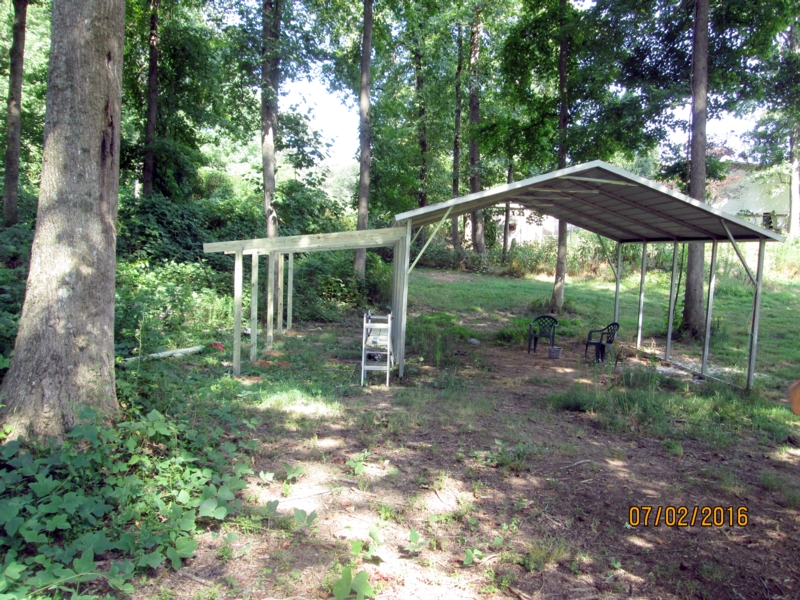 
Rear view from the bridge.
Before the rafters went up.
 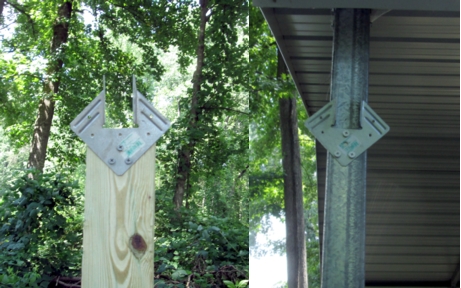
This is the hardware we used
to attach the rafters to the carport and posts.
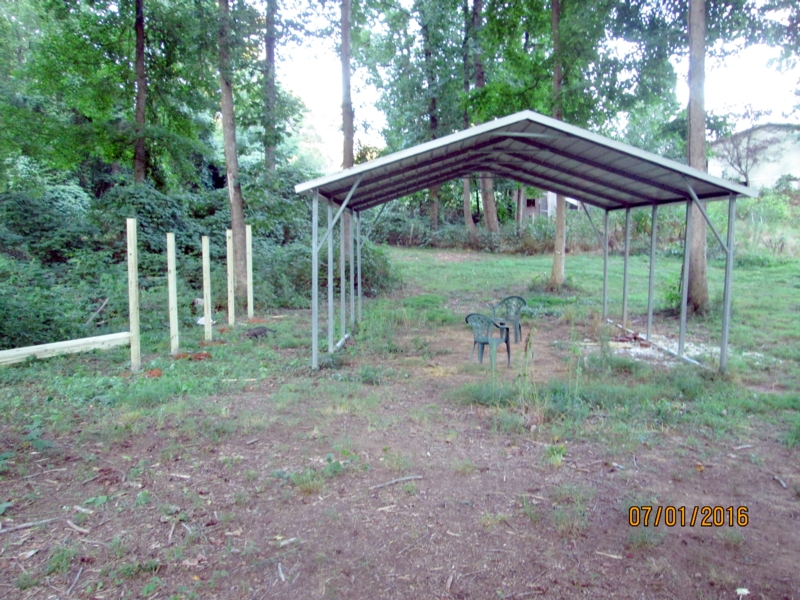
We began setting posts on 7-1-16.
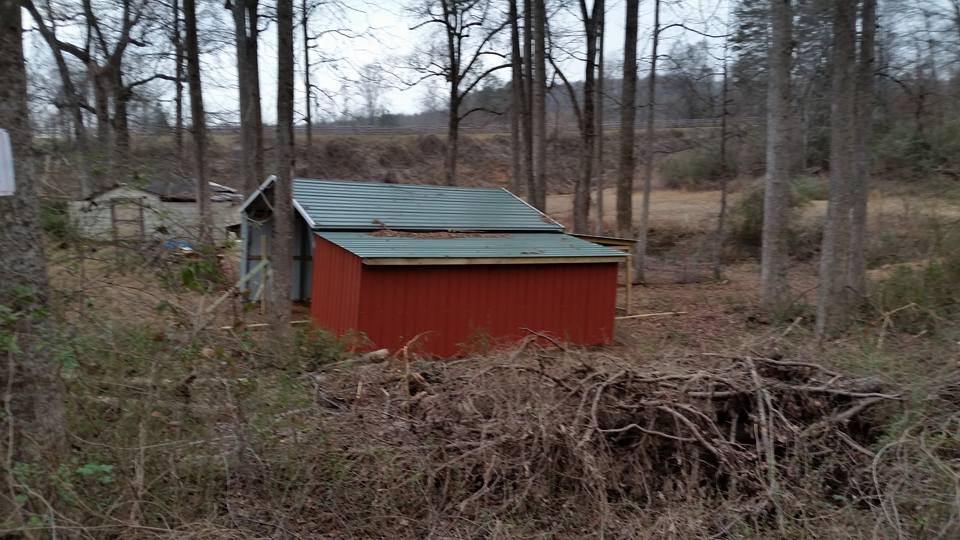
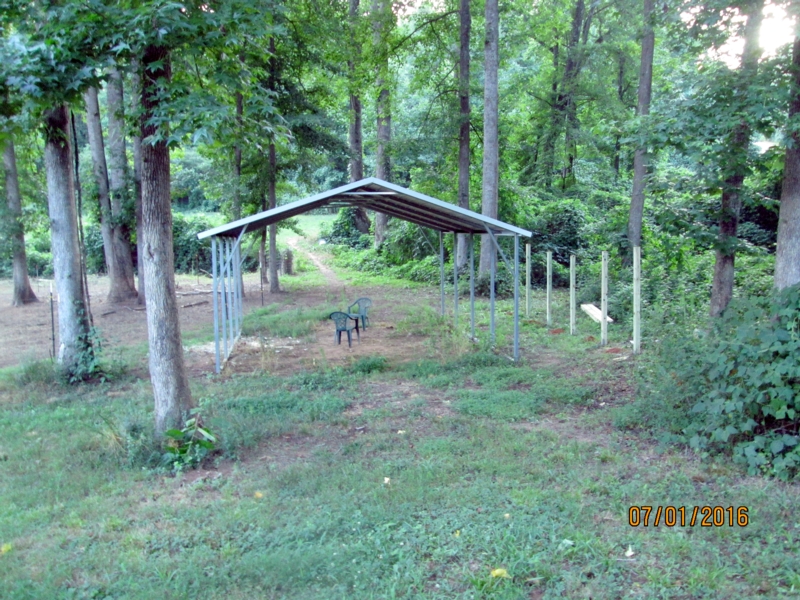
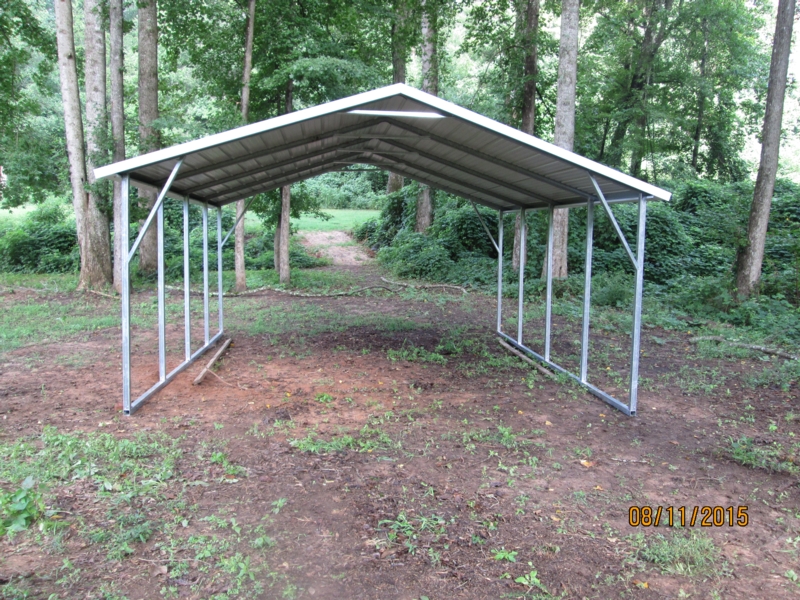
August 11th, 2015
Carport is in!

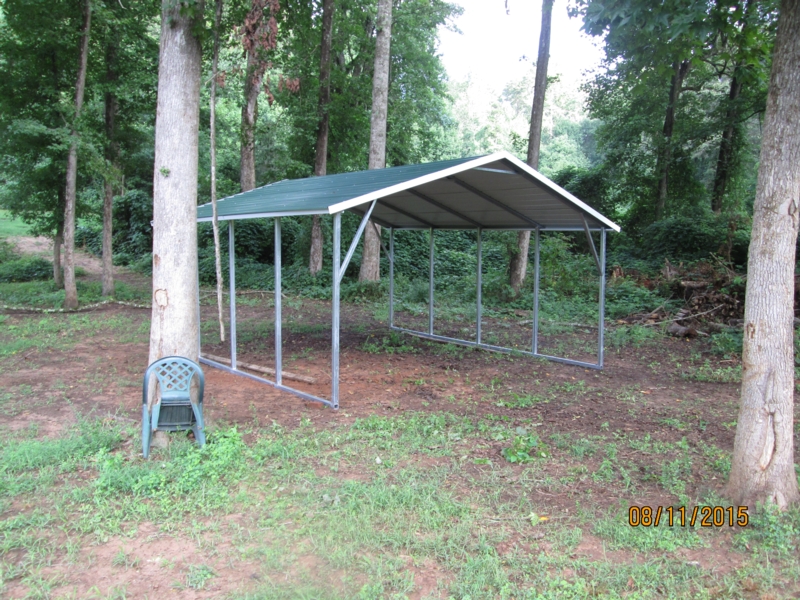
The carport was just
delivered and set-up today 8-11-15. This view is from the
house or hill next to the house down.
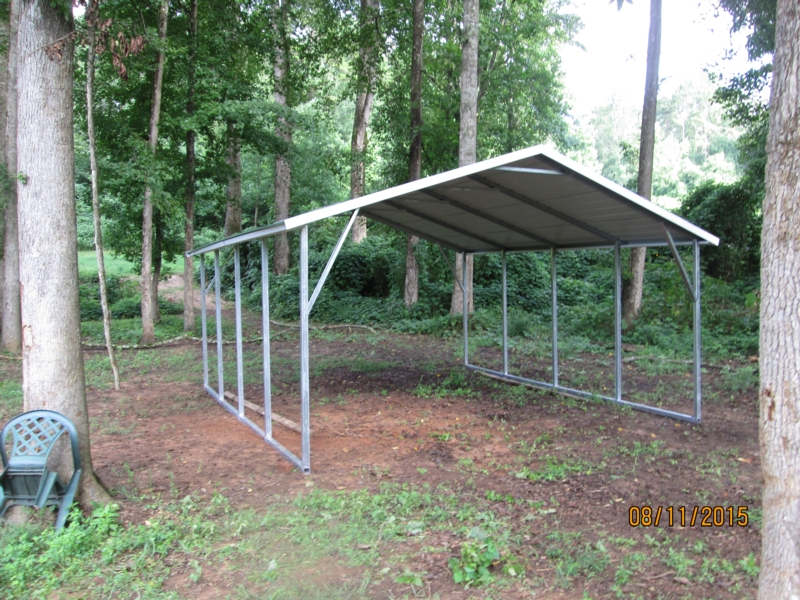
This view is coming up on it. the height is definitely
evident when you're near it.


(Left) View from the road/future drive way showing it in
relation to the old doe barn.
(Right) Rear view from the bridge towards the chicken
coop/road.
July 6th, 2015
The following photos were before the carport
was put in on 7-6-15.

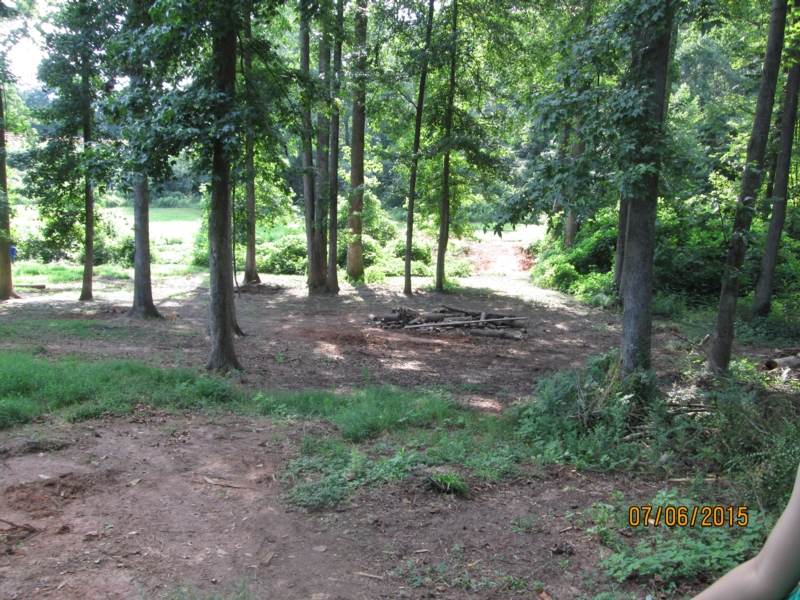
(Left) View down to where the
new barn will be from the house.
(Right) View from the drive opening near the road to where
the barn will be.
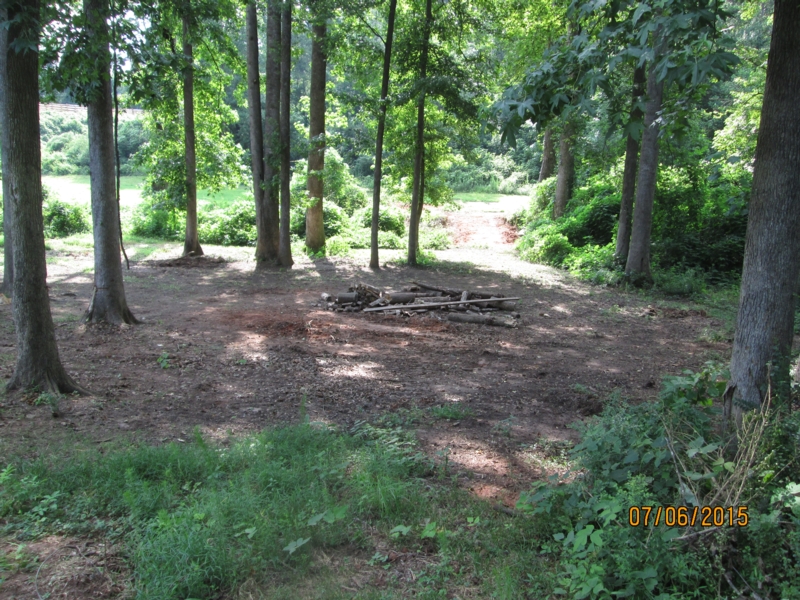
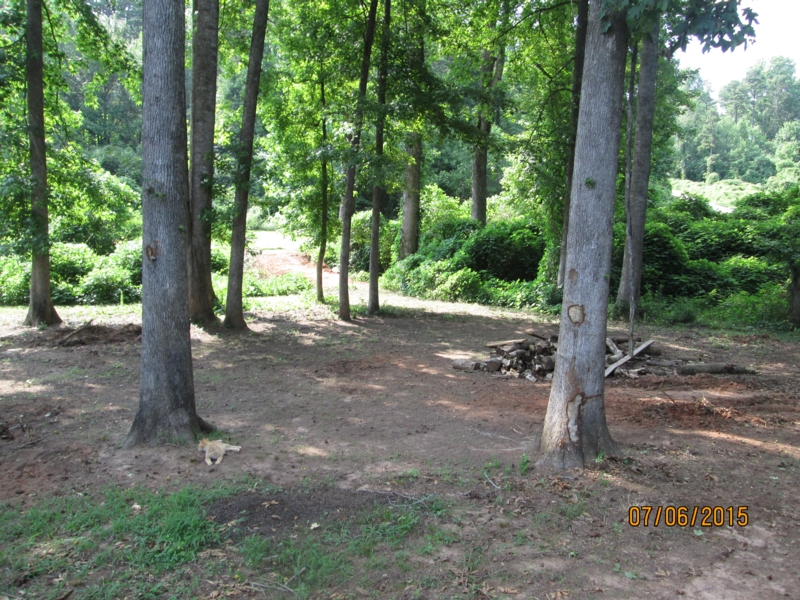
(Left) Closer view of the
last photo.
(Right) Closer view of the first photo.

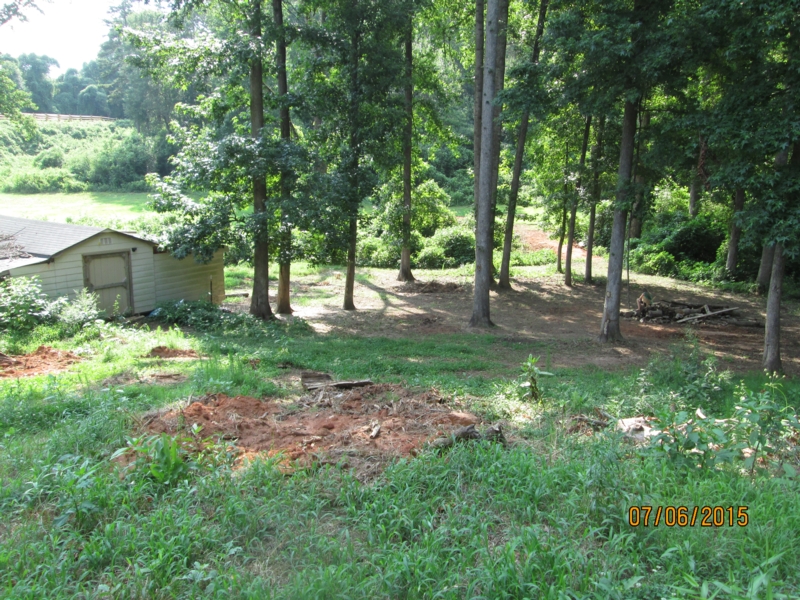
(Left) Back to the road, this
is the side facing the road.
(Right) Up near the chicken coop, view down to the old doe
barn and where the new barn will be located.
Itemized List of Expenses
This is an
itemized list of all the costs of our carport barn.
It will be added to as more is done to the barn.
Items where tax is mentioned will have it included.
Otherwise its before tax.
Updated as of 2-22-17
|
Amount |
Description |
|
$1,011.41 |
Carport:
Purchase of the actual carport. The base price
for the A-Frame style was $895 with 6' legs. We
chose to add 2' to the legs to make it 8' high
so that lean-to's could be added later on. Each
foot of height is an addition $50. We also
happened to order ours when they were doing a 5%
off discount so that took $49.75 off. Tax was
$66.17. Down payment was $94.52, pay-off at
set-up $916.90. |
|
$16.80 |
20 Hurricane
Rafter Ties are $0.84 each. |
|
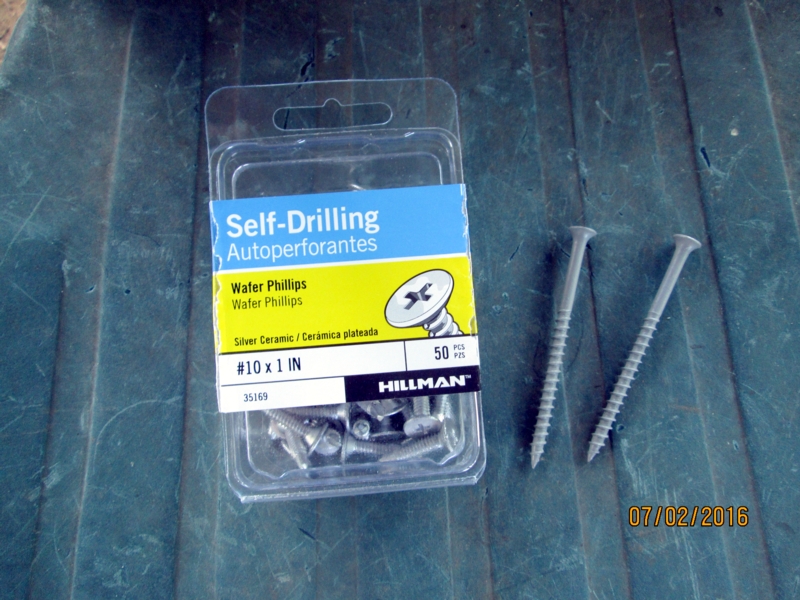
$5.78 |
Wafer screws
(self-tapping to metal studs) 50ct. |
|
$76.70 |
10 4x4x8 @
$7.67 each from Home Depot. |
|
$117.92 |
16 2x6x10 @
$7.37 each from Home Depot/HD. |
|
$12.47 |
1 4x4x10
for the center post on the back. |
|
$14.70 |
3 Bags of
Sakrete Fast-Set Concrete from Home Depot @
$4.90 each. |
|
$1.34 |
2 Fence
Brackets @ $0.67 each. |
|
$4.56 |
2 Saddle Rafter
Ties @ $2.28 each. |
|
$5.97 |
Screws 8x1"
Drill Pt 170pcs. |
|
$142.91 |
3 Sheets of 21'
Metal Roofing in evergreen. 3' wide. $2.12
per linear foot is $44.52 each. Tax $9.35
purchased from Victory Metal. |
|
$8.47 |
#10 3" PG10 EX
Strews 1lb |
|
$8.47 |
2x6x12 Treated
$8.47 from Home Depot |
|
$44.22 |
66 2"x4" 20GA
Zmax Fence Bracket 66 @ $0.67 for closing in
the sides from Home Depot. |
|
$17.22 |
2x4x8 Treated
6 @ $2.87 each. For closing in the sides from
Lowes. |
|
$82.79 |
2x4x10 Treated
17 @ $4.87 each. For closing in he sides from
Lowes. |
|
$30.70 |
2x4x8 Treated
10 @ $3.07 each. For framing in the front.
Bought from Lowes. |
|
$522.58 |
Metal for the
roof & enclosing
Evergreen we bought 4 pieces at 19' long,
however only used 3 (oops, measure next time).
4 @ 19' = $167.20
In Rustic Red:
2 @ 7' = $30.80
7 @ 6.6' =$100.10
3 @ 7.6' =$49.50
8 @ 8' = $140.80
$2.20 per linear foot + tax. Purchased from
Victory Metal. |
|
$141.24 |
Metal for the
back walls
Rustic Red for the siding
6 @ 6.6' =$84.00
1 @ 7' =$15.00
1 @ 7.6' =$16.00
1 @ 8' =$17.00
Weird way to price things, but $132.00+9.24 tax
total. Purchased from Victory Metal. |
|
$6.41 |
Teks #8 1" Self
Tapping Screws |
|
$117.70 |
Metal for the
front
Rustic Red for the siding
2 @ 10.6' =$46.20
2 @ 9.6'=$41.80
2 @ 5'=$22.00
Total of $110.00 plus $7.70 tax = $117.70.
Purchased from Victory Metal. |
|
$76.59 |
Hardware and
Wood for Front Doors and Back Door Framing
1 4x4x8 =$7.57
3 2x6x10 treated @ $6.77ea=$20.31
7 2x4x8 treated @ $3.98ea=$27.86
8 Rigid Tie Angle @ $1.98ea=$15.84
Purchased from Home Depot for a total+tax of
$76.59. |
|
$58.85 |
Metal for the
Front Doors and Roof above the back lean-to
(Gable).
Rustic Red for the siding, purchased from
their cull section along with 2 pieces of green
flashing to go over the back roof behind the red
wall.
2 @ 10' evergreen L
4 @ 7' rustic red
$55 + tax $58.85
Purchased from Victory Metal. |
|
$2,611.56 |
Current Total as of
2-22-17
Left to include:
Door hardware for the front and goat doors.
Trimming - trim is sold in 10' pieces $19ea. We
will need 5 for outside corners, 1 inside corner
in rustic red. 4 eave pieces in white and a
gallon of exterior white to match to paint the
2x6's. |
|
